RFX
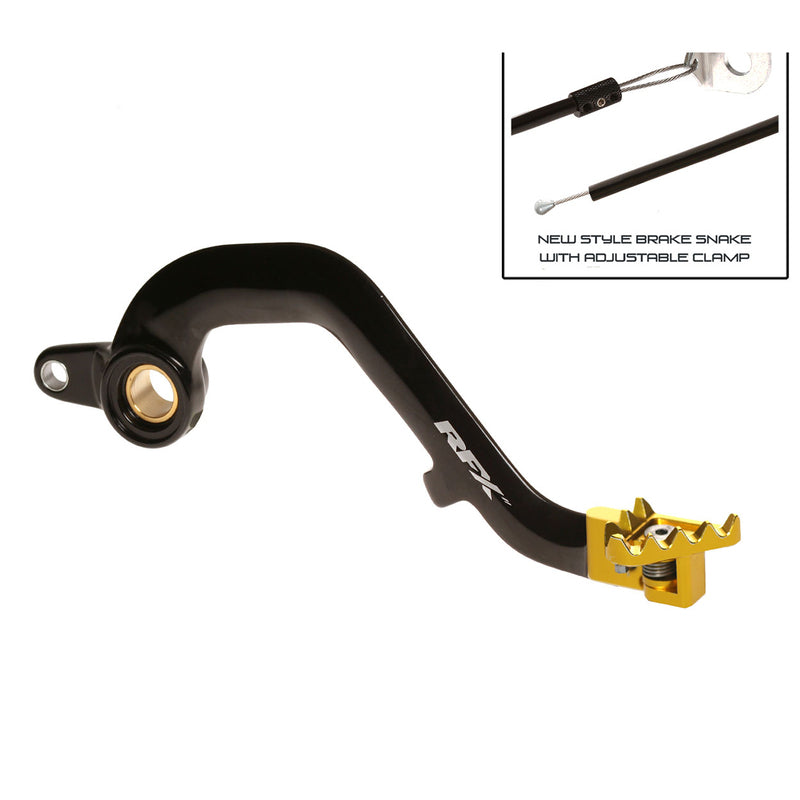
RFX Pro FT Rear Brake Lever (Black/Yellow) - Suzuki RM250
RFX Pro FT Rear Brake Lever (Black/Yellow) - Suzuki RM250
SKU:1110838001
RFX Pro Series Brake Pedal
RFX Pro Series Brake Pedals are designed and tested at the highest level.
Pro Series Brake Pedals are manufactured from 7075-T6 aluminium and feature an OEM type forged shaft, a smooth finish on the shaft helps to reduce the wear associated with a ridged design.
Pro Series Flexible tips are CNC machined billet aluminium and feature a spring loaded rotatable tip which under impact such as in a rut will spin to reduce damage. The tip also features steel teeth to help grip in muddy conditions.
Pro Series Flexible tips also incorporate a stop on the pivot tip, this stops the tip at 90 degrees of rotation preventing damage that can occur if the tip rotates under the clutch cover.
Pro Series Brake Pedals also incorporate a cable brake snake, this helps prevent the pedal shaft being bent around in a collision.
Tag Line:
CNC Flexible Tip
To reduce impact damage
Cold Forged Arm
For improved core strength
Features:
- Made from 7075 aerospace aluminium construction.
- T6 heat treated to increase tensile strength.
- Forged shaft for increased core strength.
- Smooth shaft design to reduce surface wear.
- CNC machined billet flexible tip.
- Rotating action reduces impact damage.
- Steel insert teeth for increased grip.
- Mechanical stop on the tip.
- Incorporated brake snake.
- Colour anodised to prevent corrosion.
- Laser etched logo.
Fitting Instructions:
- Start by taking note mark where the height if the pedal tip is in relation to the footpeg.
- Remove the R-clip or split pin from the rear of the brake bolt located behind the frame.
- Remove the pivot bolt holding the pedal to the frame.
- Detach the return spring from the pedal and leave hanging.
- Spin the pedal outwards exposing the split pin at the rear of the pedal clevis.
- Remove this split pin and the locating dowel, the rear brake pedal will now remove.
- Remove the oil seals from the old pedal clean and re-fit to the new pedal.
- Clean all the parts with a multi-purpose lube such as maxima MPPL, ready for re-installing.
- Re- fit the Brake clevis, Locating pin and split pin.
- Re-Fit the return spring.
- Apply some Maxima waterproof grease to the pivot bolt align the pivot hole and re-fit the bolt.
- Torque the pivot bolt to the required torque as per the owner’s manual.
- Re-fit the R-clip/Split pin to the rear of the pivot bolt.
- With the pedal now attached adjust the pedal height to the correct position and free play, do this by loosening the nut above the clevis and turning the plunger bolt inwards or outwards to suit.
- Now fit the brake snake.
- Japanese models- Remove the lower engine mount nut and washer, replace the old washer with the new washer which is attached to the brake snake.
- KTM models- Remove the new washer which is attached to the brake snake, put this aside as it’s not required on the KTM, loop the cable around the lower engine mount and replace inside the crimp fitting.
- Set the correct tension on the brake snake, remembering to allow for the pedal to extend down.
- Crimp the fitting together using pliers and trim excess cable.
Kan beschikbaarheid voor afhalen niet laden
Verzenden en bezorgen
Verzenden en bezorgen
Wil je meer weten over onze verzendkosten of verwachte levertijden. Klik dan hier.
Cadeaubon
Cadeaubon
Heb je een cadeaubon ontvangen en wil je deze verzilveren op je aankoop , lees hier meer over cadeaubonnen.
Klantenservice
Klantenservice
Wij zijn bereikbaar op 0174-515134 of via email info@motocrossshop.nl
Voor alle andere informatie en openingstijden, bekijk dan onze contactpagina.


